Songs Used :
- Sunday Bloddy Sunday by U2
- Runaway Train by Soul Asylum
- Mad World by Gary Jules
The First song I put in the mix is Sunday Bloody Sunday then I had a sound of a train crossing going into the next song, Runaway Train, after that song I have a sound of rain going to the last song, Mad World.
Thursday, December 23, 2010
Wednesday, December 1, 2010
Rollover Button
 To create a rollover image/button, You need to use a program call Adobe Dreamweaver. I used Adobe Illustrator to create the two buttons, the one that you see without the pointer over it and the one that you see when the pointer
 goes over it. When I was done with the two buttons I opened up Dreamweaver and with all of my pages I placed all buttons that made by selecting Layout on the top of the page then Draw AP Div. Using that tool Click a drag open a box where I would be placing the buttons. Then I went back to common and selected Rollover Image out the the Images menu. Then did what it told me to do after that.
Friday, November 19, 2010
Web Pages
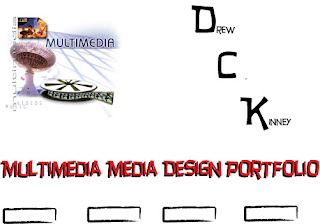
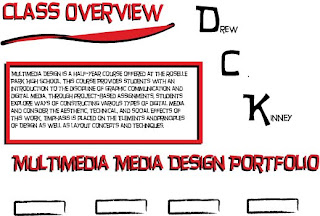
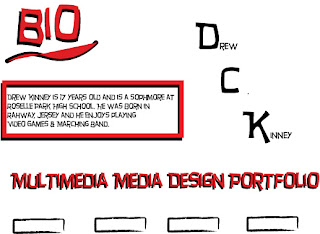
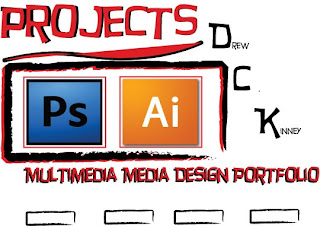
For these webs pages I used Adobe Illustrator. I have borders where I will put my links. I have four webs pages, the first one in the Homepage where it stats what the website is about. The second page is the Class Overview page where it tells you what the multimedia class is and do. The third page is the Bio page, and it's about me and my interests. Finally the last page, the projects page where it show the name of the programs we use.
Tuesday, November 9, 2010
Photoshop_Montage


Step 1 - I got a picture of me from marching band
step 2 - I got the picture that I wanted to put my face on
Step 3 - I got the background picture that I wanted to have behind me
Step 4 - I made the picture with Jeff Gordon smaller
Step 5 - I placed my picture over Jeff Gordon
Step 6 - I used a layer mask and the paint brush to take away background you don't want
Tuesday, November 2, 2010
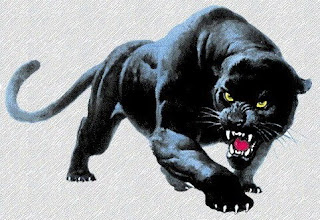
PHOTOSHOP_TENNIS : Pather
MAIN PICTURE
________________________________

________________________________
Step 1 - I made the forest the background
Step 2 - I added a layer mask
Step 3 - I started to take away the pather's oringinal background
________________________________
Step 1 -He feathered the coners
Step 2 - He colored the eyes red
Step 3 - He used the blur tool around the eyes
________________________________
Step 1 - I placed a vikings hat with horns on the panther
Step 2 - I added a new layer mask
Step 3 - I took out the helmet and kept the horns
Thursday, October 28, 2010
PHOTOSHOP_Magnetic Lasso
PHOTOSHOP_Feathered Edges
Wednesday, October 27, 2010
PHOTOSHOP_Layer Mask
 For this project I used Photoshop and used a few tools, the blur tool and the paint brush. I had two pictures open and the sunset was my background picture. I created a new layer and with the top layer selected I drag the eagle picture in. After that I clicked the add layer mask tool. Then used the paint brush to slowly take away the background from the eagle picture. Then I used the blur tool around the eagle.
PHOTOSHOP_Combo
Wednesday, October 13, 2010
KINNEY_FlyerJPEG

For this project I made a flyer to promote the Roselle Park High School TOB Home Show. I used Adobe Illustrator to create it and used many Elements and Principles of Design. The first principle I used repetition and I used it for a few things. The first thing I used it on was the border I copied multiple circles and pasted them around the edge of the page. I made the circles by using the ellipse tool to make one circle then I changed the brush to 5pt flat. Then copied and pasted it as many times as I needed. The second thing I used it on was the music notes I placed on the page. I created them by making small circles, for some of them, and then used the line segment tool to about the length of a music note and I place the line near or on the circle.
The second principle I used for this flyer was emphasis and I used it on two things. The first thing I used it on was the picture of our Marching Band. When I pasted it on the page I thought that it would give the people that are looking at it more interest. The why I got the picture was I downloaded a program at home called SnapShot that would let me take snap shots of my computer screen. Then I watched a video of us performing and I paused it where I thought it would make a great photo. Then I sent to my email then opened it up in school, and then I copied and pasted it onto the page. After that I placed a border around the picture. The second thing I used this for was the symbol, Atlantic Coast Championship 2009 Finalist with the TOB logo in the middle. The hard thing about this was trying to make the logo for TOB. I used the line segment tool, the ellipse tool, and the rectangle tool. I used eight lines, two circles, and three rectangles.
The second principle I used for this flyer was emphasis and I used it on two things. The first thing I used it on was the picture of our Marching Band. When I pasted it on the page I thought that it would give the people that are looking at it more interest. The why I got the picture was I downloaded a program at home called SnapShot that would let me take snap shots of my computer screen. Then I watched a video of us performing and I paused it where I thought it would make a great photo. Then I sent to my email then opened it up in school, and then I copied and pasted it onto the page. After that I placed a border around the picture. The second thing I used this for was the symbol, Atlantic Coast Championship 2009 Finalist with the TOB logo in the middle. The hard thing about this was trying to make the logo for TOB. I used the line segment tool, the ellipse tool, and the rectangle tool. I used eight lines, two circles, and three rectangles.
Tuesday, October 5, 2010
ILLUSTRATOR: Combining Shapes 2
The first thing I've done here was select the polygon shape and then placed 4 thin rectangles on the side. Then I start place onto the rectangle by rotating them and subtracting them from the shape.
ILLUSTRATOR: Combining Shapes 1
The first thing I did here was go to the rectangle tool and held it down to get other options. Then I went down to rounded rectangle and place it on the paper. Then I chose the star and I selected them both with the group selection tool. I then added the two shapes together. Then I put a circle in there and subtracted it.


ILLUSTRATOR: Text on Path 2
Wednesday, September 29, 2010
ILLUSTRATOR: Text on Path 1
The first thing I did was use the pencil tool to make a line. Then I held down on the text tool and went down to the tex on path tool. I then wrote the name of class I'm taking, "Multimedia Design", at the starting point of the line I started to write the text.
ILLUSTRATOR: Clipping Mask 2
The first thing I did on this project was open up Adobe Illustrator and Internet Explorer. Then on google and found an image of space that I wanted to use the Clipping Mask tool on. When I found the Picture on the internet I copied and pasted them on Illustrator. Then I used the text tool to write what my picture is, Space, in the middle of the picture. Then I used the group selection tool to highlight both the image and the text. At the end I went into object at the top of the page and went down to Clipping Mask then to make.

Tuesday, September 28, 2010
ILLUSTRATOR: Clipping Mask 1
The first thing I did on this project was open up Adobe Illustrator and Internet Explorer. Then on google and found an image of under the ocean that I wanted to use the Clipping Mask tool on. When I found the picture on the internet I copied and pasted them on Illustrator. Then I used the text tool to write my name, Drew Kinney, in the middle of the picture. Then I used the group selection tool to highlight both the image and my name. At the end I went into objectives at the top of the page and went down to Clipping Mask then to make.
Monday, September 20, 2010
Welcome!
Hi! My name is Drew Kinney and I will be using this blog as a portolio for my Multimedia Design class. I will be posting my projects and examples along with a brief description of what I did. Please check back to see my work!
Subscribe to:
Comments (Atom)


